You can make a healthy and fresh soup that contains great ingredients such as tomato. I have an easy recipe for making that with the homemade procedure. It is possible to pack it in the form of canned or bottled packaging.
The most delicious recipe for tomato soup from a can! An excellent method for putting those excess tomatoes from the garden to good use. When you are ready to serve, combine with milk in an equal amount and heat.
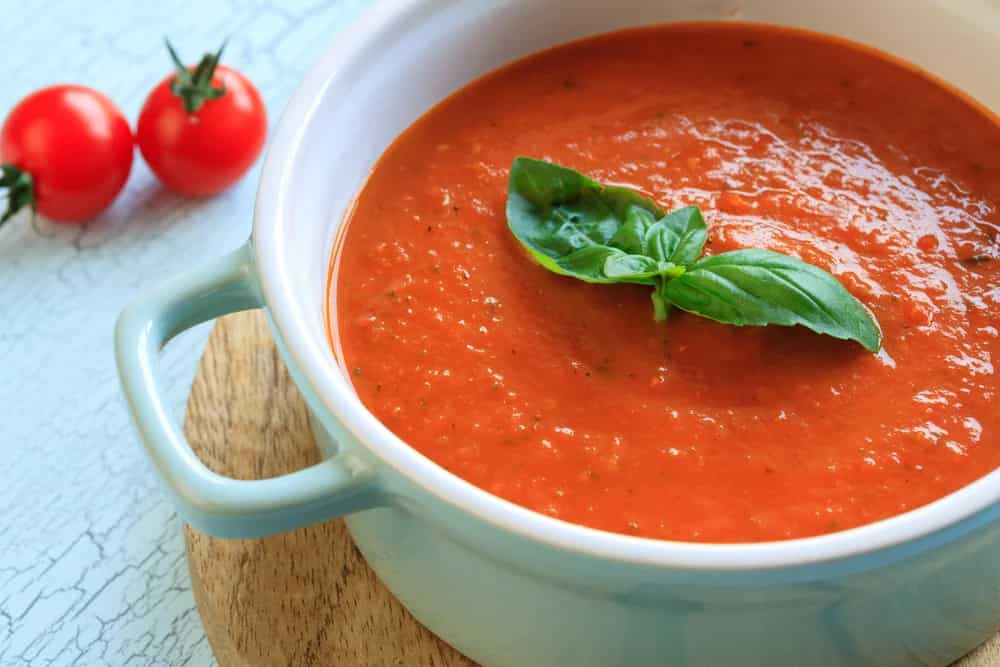
Canning tomato soup is an excellent method for putting excess tomatoes to good use. We like to can our tomato soup in mason jars that hold one cup because they are convenient for a speedy option for lunch.
Over the years, I’ve experimented with a few different recipes for home-canned tomato soup, but none of them turned out to be just what I wanted for my family. All that we wanted was a straightforward tomato soup, something along the lines of Campbell’s or Amy’s, but made using tomatoes, vegetables, and herbs produced in our own backyard for a more authentic taste.

This is the year that we can finally declare a victory. Because of its slightly increased thickness and concentration, this recipe for tomato soup requires significantly less room to be stored. When you are ready to serve it, you have the option of adding either water, broth, or milk.
Instead of quart jars, process it in pint or half-pint jars to ensure a uniform temperature throughout (because of the thickening).
When you make tomato soup with paste tomatoes, rather than tomatoes with more juice, the soup will have a denser consistency. Yesterday I made a batch with largely cherry tomatoes and any other tomatoes I could find in the garden. After it had been allowed to thicken, it was very much the same consistency as regular soup, so I decreased the amount of salt and canned it in pint jars rather than half pint jars.
If you follow this instruction step by step, you will quickly discover how simple it is to can tomato soup. This recipe for tomato soup foundation is the epitome of comfort food, and it can be preserved either by using a pressure canner or a water bath canner.
As an Amazon Associate, I get a commission on orders that meet certain criteria.

However, peeling and pureeing tomatoes every time you want soup is a very time-consuming process, despite the fact that homemade tomato soup is delicious and tastes quite fresh. Not to mention the fact that the tomato season in Seattle only lasts for about a month and a half.
The question is, what is a girl who is infatuated with soup to do? She can make her own base of tomato soup!
WHAT KINDS OF TOMATOES ARE IDEAL FOR STORING TOMATO SOUP IN THE FREEZER?
Simple solution: use whichever tomatoes you have on hand. The flavor of paste-style tomatoes is typically not very interesting, despite the fact that they are thicker and have fewer seeds than traditional tomatoes.
During the growing season, I keep myself busy by bottling whole tomatoes and stewed tomatoes, but I hold off on canning tomato soup until the end of the season when there are just a few random tomatoes left. Because you get all of the rich and fantastic tomatoey flavors in one lovely bowl, soup made from random tomatoes is the best soup you can cook.
To make 14 pints or 7 quarts of tomato sauce, you will need approximately 45 pounds of tomatoes. I can in tiny batches, usually producing between one to four quarts at a time because I rarely have that many items all at once. It tastes the same no matter what.
If you grow your own tomatoes but don’t have enough at once to can them, you can freeze them on baking trays and then transfer them to freezer bags (I love these reusable silicone bags) until you have enough to can. This is a pro tip. If you grow your own tomatoes but don’t have enough at once to can them, you can freeze them on baking trays.

WHY DO I NEED BOTTLED LEMON JUICE?
To maintain a constant PH level and maintain the desired degree of acidity in the tomatoes, the addition of lemon juice is required. Lemon juice purchased from the supermarket typically contains the same amount of acidity (five percent) throughout all of its bottles. When using lemons that have recently been squeezed, you do not have this guarantee.
HOW TO CAN TOMATO SOUP (PRESSURE CAN) – STEP BY STEP
I’ll provide you with a photo walkthrough of the process because I find that it’s the best way to explain it, especially if you’re new to canning. You’ll also find a recipe card that’s downloadable and full of instructions at the very bottom of this post. If you don’t want to preserve this soup using the pressure canner, the recipe card also includes directions for water bath canning.
First, give all of those amazing tomatoes a quick rinse, and then chop them in half. If you have large pieces, you should chop them up into smaller pieces first. A strainer or a colander should be placed inside of a large bowl.
Do not forget to wash and clean your jars. Jars with a normal opening and a quart capacity are the best option for canning soup. It is no longer necessary to sterilize jars before canning (hooray!), but you should still ensure that they are sufficiently toasted so that they will not crack when placed in hot water.
You can either place them in a clean dishwasher and run them through a brief wash cycle, or you can place them in a large pan with some water and keep them in an oven set to a low temperature (my lowest temperature is 170 degrees) until you need them. I’ve even tried just filling them with hot water from the sink and letting them sit there for a while.
Your lids should be washed in hot soapy water, and then placed in a fresh bowl for the time being.
Place the tomatoes in a large pot filled with boiling water and parboil them for a few minutes, or until the peel of one of the tomatoes begins to loosen (about 1-2 minutes). You may learn how to blanch and peel tomatoes by reading more in-depth instructions on the topic.
To take the tomatoes from the pan, use a slotted spoon, and then place them in the strainer.
The seeds and skins of the tomatoes can be easily removed by running them in a food mill. In the event that my tomatoes have an abnormally high amount of liquid, I shall pass them through a strainer made of mesh.
An important piece of advice is to put the skins and seeds through the food mill two more times after the bowl is entirely full of them. Every time I use these leftovers, I end up with almost an extra quart of material.
Put the tomato puree in a slow cooker or a pot with a low heat setting, and stir it occasionally. Keep heated until it is time to can the food.

Put your canner on a burner set to high heat and fill it with three quarts’ worth of water. Check to see that the canner is equipped with a canning rack at the very bottom. (As a reminder, these are the directions for canning under pressure. For information on how to can using a water bath, please refer to the recipe card.
Put a funnel on top of a canning jar, add the lemon juice or citric acid, and then carefully pour the warm tomato puree into the jar, making sure to leave an inch of headspace. Headspace is the area that exists between the very top of the liquid in the container and the very top of the container itself. Remove any bubbles that may be present in the container (I use a plastic chopstick).
Make certain that the rims of the jars do not have any food residue by using a clean, damp rag to wipe them down.
It should be tight enough that it won’t come off, but not so tight that the Hulk wouldn’t be able to move it. Put a clean lid on the jar first, followed by a ring, and then tighten the ring until it is fingertip tight.
Put the jars in the canner when you’re done. If you don’t have enough jars to fill the canner, you might still want to consider canning some water in a few jars so that you have a supply of drinking water on hand in case of an emergency.

Put the cover back on. As soon as possible, steam will begin to emerge from the vent pipe (I call it the steam chimney). Ten minutes should elapse during which the steam should be allowed to travel through. The pressure regulator, which I refer to as the chimney cap, should then be placed on top.
In not too much longer, the air vent will unfold itself. This is an indication that pressure is beginning to build up inside the canner.
In typical circumstances, tomato soup must be processed in a pressure canner at 11 pounds of pressure for 15 minutes in order to be packaged in either pints or quarts.
When the dial gauge hits 11 pounds of pressure, turn the burner temperature down to medium and begin the 15-minute timer on your kitchen timer. For the next quarter of an hour, the barometric pressure needs to remain at 11 or (a little bit) above.
Depending on the type of stove you have, you will probably have to turn the temperature dial on the burner a few times.
When the 15 minutes are up, take the canner off the burner and let it sit until you hear a definite “click” from the air vent dropping. This indicates that the canner is ready to be used. After removing the pressure regulator, remove the lid from the container very carefully.

Canning tongs should be used to remove the jars after allowing them to sit in the canner for a period of five minutes. Put them in a position where they won’t be disturbed for the next twelve hours by placing them on a towel.
After a few hours, in order to ensure that the lid is properly sealed, press down lightly in the middle of it. If there is no give in the lid, then the container is sealed. Your jars are not properly sealed if you can press the lid in and hear it pop even slightly. You have the option of processing them again or storing them in the refrigerator or freezer (only freeze jars that are wide-mouth). Put it away in a dark, dry, and cold place for up to a year.
Your comment submitted.